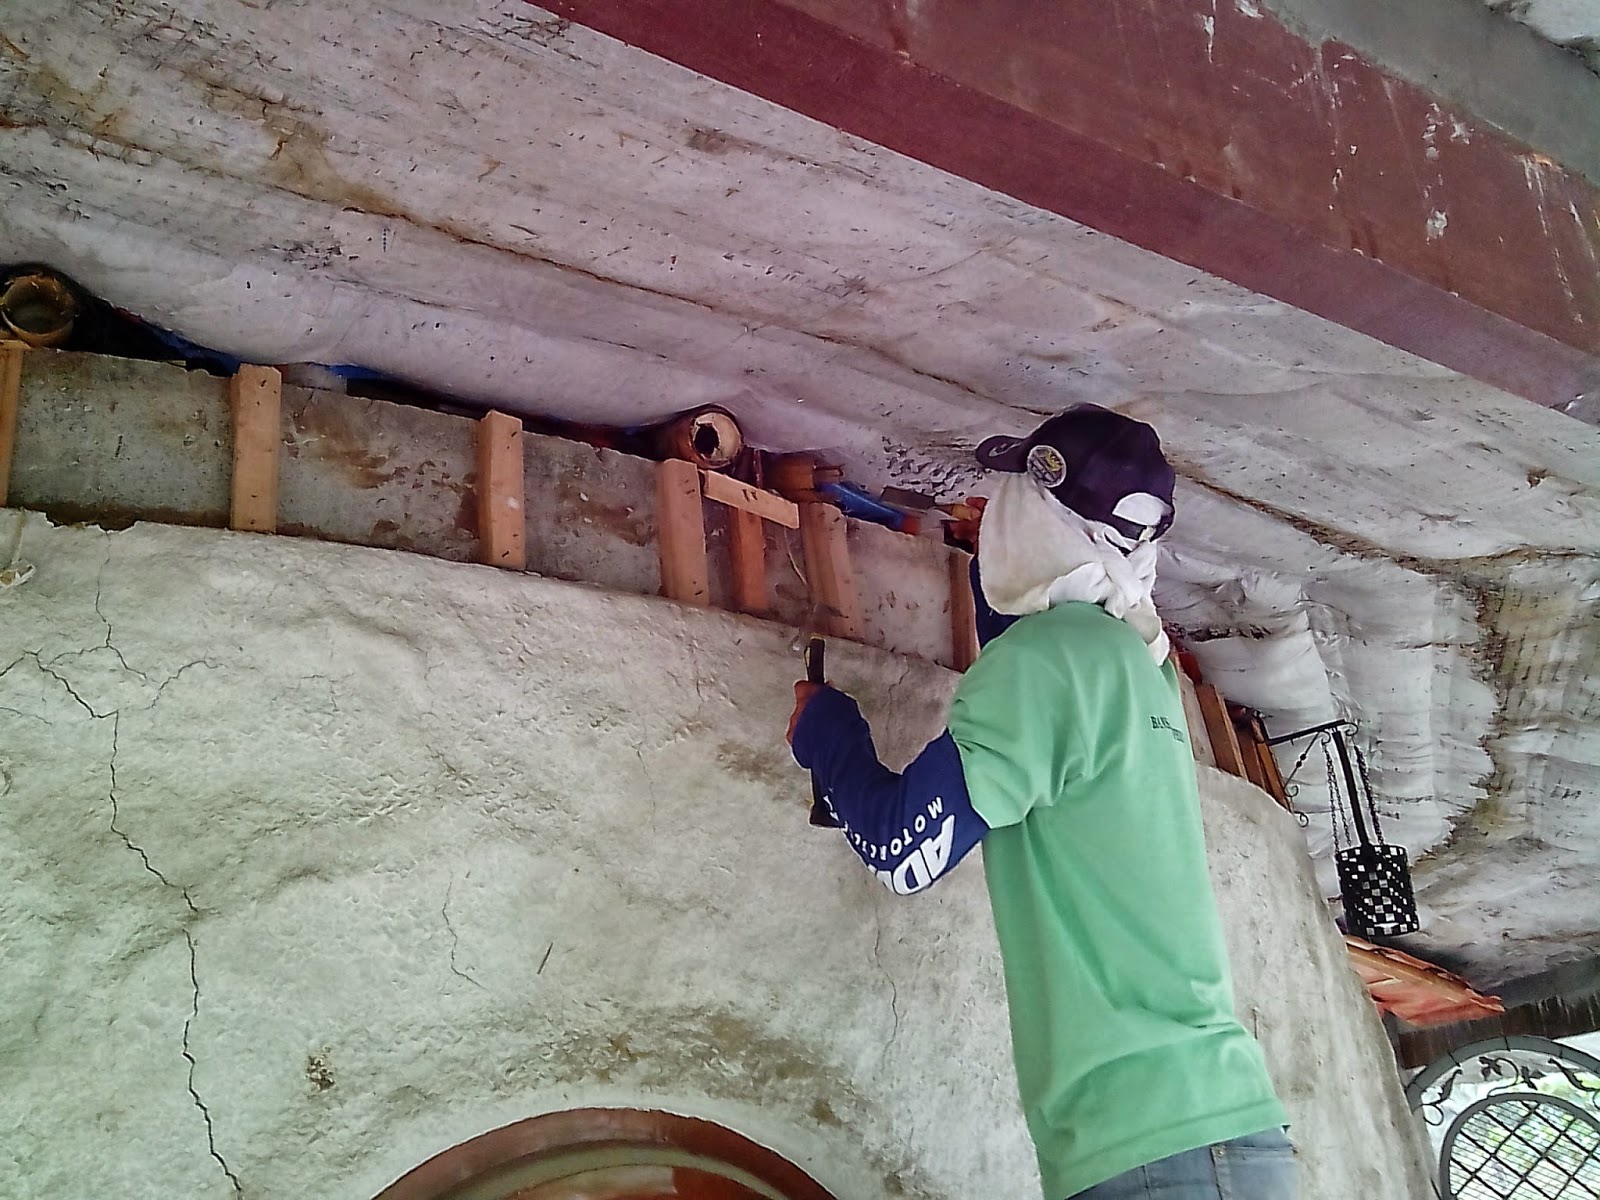
Shotcreting of the eaves continues. They applied the first coat of the cementitious powermix, Bostik, after all the cracks have been sealed with Polytuf. The mason is finishing the edge of the roof. Once that is done his job will be done. The remaining workers will be the ones to finish waterproofing and painting the roof.
We had a visitor for the past 4 days so we were not able to keep an eye on the work, but, thankfully, there is continued progress every time we come home at the end of the day.
Monday, March 30, 2015
Tuesday, March 24, 2015
Day 51
The shotcrete work under the eaves continues. So far we had to repeat the process 5 times and then the 6th time we will apply pure cement shotcrete to complete cover everything. On the roof, the mason started applying polytuf to seal the tiny cracks all over before we apply the waterproofing.
Monday, March 23, 2015
Day 49

The gap between the bond beam and the roof is now sealed off. We placed slightly bigger pipes to house the conduit pipes for easy access when there is need for repairs.

More of the gap being sealed off.

Now starting the shotcrete under the eaves.

He sprays a thin layer of cement evenly, then comes back to do another layer. He will probably have to do this at least 4 or 5 times depending on when we can achieve the desired thickness of the concrete. They had to make the cement/sand mix watery so it can shoot upward easily. It is not so when we did the wall as it is simply a horizontal spraying direction. Spraying upward has resulted to a lot of sand falling off when it dries up. There's so much left over. We forgot to put tarp underneath to collect them so we had to sweep them off, which stirred up so much dust. Today we made sure that tarp is laid all over the floor for easy clean up later today.
Friday, March 20, 2015
Day 46 & 47
Our worker removing the wood from the concrete bond beam. The other one (not in the picture) removing the remaining portion of the bamboo rafter that is connected to the bond beam.

The patio roof without all the bamboo rafters and with the concrete mini-beam.

From the other side of the house.
The underside of the patio roof has this wavy pattern which actually looks nice but these will be covered with shotcrete to protect the wire mesh from getting rusty. So it will look exactly like our outer wall except we will be painting the roof to make it waterproof.
We also have decided against putting screen around the bond beam because it will take so much time just to install it ad secure it to the bond beam. Instead we will be cementing the gap between the bond beam and the roof.
As I mentioned before, part of being our own contractor/supplier we buy our own materials. What we realized is that almost everyday we go and get supplies or materials/tools. Doing this renovation with no set procedure or way of doing things, we are simply learning and deciding as we go along. However, we will surely be more experienced when we go on to our next ferrocement project.
So far we have learned the following:
1. The quality of materials here are not the same as in the U.S. Most of the time the locals use sub-standard materials which does make a huge difference when you are trying to do a quality job.
2. You have to do your own canvassing to find the best quality material for the best price. Prices vary from cheap to expensive for the same item. It does help to shop around.
3. Most, if not everyone, will use the same product just because it's been used for the longest time. But if you do your research, you will find a much better product for lower price.
Wednesday, March 18, 2015
Day 45

Removed the bamboo rafters, left are 3 inch nails we used to attach the rafters to the wood beam. Without the rafters the patio roof is simply held up by itself, which is termed "flying concrete". We decided to just close the gap between the wood beam and the roof to make the connection more solid.

From a different angle, you could see the remaining 3 inch nails and the gap.

We placed 2 slats of bamboo to provide temporary backing for the cement.

This is our mini-beam on top of the wood beam.
Work continues on the removal of the remaining bamboo rafters. It is taking a while because it is not easy to saw off these solid bamboo. Our cutter blades keep on getting blunt quite often. At least there's much progress at the end of the day.
Monday, March 16, 2015
Day 43
We were in town yesterday to get parts for our compressor so we can use it to spray the cement mix under the eaves of our patio roof. We got the connectors and adaptors but we found out later when we checked the compressor itself that the second hole is smaller than the other one. So our connectors do not fit.
Then when we surveyed the removal of the bamboo purlins, we realized that the workers removed the ones actually on top of the bamboo rafters. So there is a gap between the rafter and the roof itself. Meaning, the posts are the only ones holding up the patio roof. So to remedy this we have decided to just cut out all the rafters, since it is no longer a support for the roof. We will be shoring up the wood beam with a mini-concrete beam above it with an embedded 10mm rebar. Then we will be completely cementing the space between the roof and the bond beam. Right now the junction between the patio roof and the main roof rests on 24 mini-posts on top of the bond beam, aside from the 24 flat bars connected to the bond beam which hold up the 24 bamboo rafters of the main roof. We wanted to put screen around that gap to allow air to enter, however we think it is best to just completely cement it to provide a more solid support for the roof and the wall.
We will be applying the shotcrete, the term used for spraying cement/mortar, for under the eaves and inside the house. This will be done after the posts.mini-beam and bond beam have been shored up.
Sunday, March 15, 2015
Day 42
The work on the posts and removal of the bamboo purlins/tarp continues. The entire city here is on holiday to celebrate the 78th Araw ng Dabaw. We decided to come to the city to get some supplies but due to the holiday celebrations most of the big hardware stores are closed, except for the franchise big box stores. So we borrowed the mortar spray gun from our cousin, bought the extra hose and connectors/adaptors for our compressor from the smaller hardware stores still open today. We plan to have our worker to use the compressor to apply the cement mix to the eaves of the patio. This will be a much faster application instead of having the mason throw the mix by hand. When the mason is finished with the posts, he will then work on applying the waterproofer on the main roof to seal in the cracks before we apply the neutralizer then the outdoor paint.
While we are here in town we will get the supplies we need for the waterproofing and the painting. And maybe get some plants on sale at the mall, making a day out of it.
So to all, Happy Araw ng Dabaw!
While we are here in town we will get the supplies we need for the waterproofing and the painting. And maybe get some plants on sale at the mall, making a day out of it.
So to all, Happy Araw ng Dabaw!
Friday, March 13, 2015
Days 38, 39 & 40

All the mat/plastic/net have been removed.

The bamboo purlins and tarp backing removed. This still needs finishing.

One of our workers removing the cut bamboo purlins. They need to be pried off because we had nailed/stapled in the tarp backing.

Here our mason is testing a 1:1 ratio of cement/sand mix. Eventhough this mix is stickier than the usual, and even if he throws it instead of pushes it in, portions of it still fall down. Overhead cementing is one of the toughest to do, according to our mason. W will try using our air compressor and simply apply the cement using the sand blasting method, like what we did with our outer wall.
Wednesday, March 11, 2015
Days 36 & 37

While the mason was finishing the last layer of cement, the workers removed the bamboo mat facade covering the bond beam. A few portions of the lime/cement cover came off. This will be repaired once the entire bond beam is covered.

The roof is finally done. The scaffolding will remain so that we can replace the rubber covering of the metal sheen.

Our mason cementing the first post. The rough throwing of the cement makes the post look like a tree trunk, specially once we paint it brown.
As work slows down, the 2 workers are now concentrating on removing the last of the mat/plaastic sheet/net cover we used under the patio roof. They will also have to remove the tarp backing aw well as the bamboo purlins leftover on the patio roof. This means more dust and debris around the house. So we decided to take this opportunity to go to the city and do some errands.
Monday, March 9, 2015
Days 34 & 35

Work on the final cement layer of the last level continues.

A close up view of the finished pipe vent.

The prt covered with tarp are the unfinished pipe vents.

Now working on more of the last pipe vents.

Almost complete.

Close up of the remaining ipe vents.
While our mason finishes the cementing of this last level, we cut down our workers from 4 people to 2, they have been preparing the wood posts, covering them with wire mesh, and stapling the rebars to the wood posts.
We finally cleaned out all the debris from the bond beam from inside the house. All this work meant having to move things arround the house. It was like major general cleaning! Phew! Good thing we have a small house with just enough stuff. :P
Today the workers will begin removing the bamboo facade outside the house covering the bond beam. We will cement that portion and put metal screens all around to serve as added ventilation as well as protection from any rodents, pests and snakes.
So far, having a ferrocement roof is good, however, our cell signals have weakened as well as our tv antenna. We need some kind of booster to get better signals. We hope that soon the sattelite tv company will include cell and internet too.
Friday, March 6, 2015
Days 32 & 33

Putting rebar on the existing wood posts.

The rebar will connect with the roof.

Still working on the 1st layer cement and wire mesh.

A close up of the pipe vents, the wire mesh will connect it with the main roof.

First layer of cement around the pipe vent.

View of the pipes, wire mesh, 1st layer cement and skylight.

Installed the 1st layer of wiremesh around the wood posts, the 4 rebars around it.
While they were working on these, we dealt with the stuck thatch debris on the bond beam. There were lots of dust, debris, rat nests and poop around the bond beam that we spent all day vacuuming just the 1st half of the house. We have to vacuum from the outside too as some of the debris fell on the other side of the plastic sheeting behind the mat ceiling.
Tuesday, March 3, 2015
Days 28 to 31

Working on the second to the last level. The workers had to reconfigure the bamboo scaffolding to give them room to work on laying the tarp and wire mesh. They also had to saw off the remaining bamboo purlins which took time.

Tarp covering the top levels, the rains that poured that evening got through to the bond beam, causing a few leaks. It was the wrong placement of the tarp that caused it.

If you look closely up, you will find 4 inch pipe vents we have installed to help with ventilation inside the house.

Here is how the pipe vents look like from the inside.

View of the pipe vents from outside after the 1st layer of cement and wire mesh. We discovered slightly bigger cracks after the 1st layer of cement dried up. The sand we had ordered turned out to be finer than usual. As per the ferrocement expert, for finer sand the ratio of sand to cement should be 1:1, since our workers did not know this, they used the ratio we had for coarser sand, 1:2. We decided to just add another layer of cement to make sure it will be strong enough.

While the roof is getting its final cementing, we have begun prep work of our 12 posts. We need to reinforce these posts to since they take up all the weight of the cement roof. We will be adding 4 10mm rebars around, 2 layers 1/2 inch wire mesh.
While work continues on the roof, we have been researching on the best waterproof product out here. There have been a few forums that discussed this and they recommend either the Thoroseal or Flexibond. Mostly, these were used to waterproof their ponds. We hope to figure this out soon so that we can make sure that our ferrocement roof will not leak. (It should not if the ferrocement mix was correct.)
Today we are back down in town, after doing our errands yesterday, our workers forgot to let us know we needed more of the waterproofer powder, Sahara. Well, that is part of being your own contractor and owner. Anyway, we needed more wire mesh for the posts. :)
Subscribe to:
Posts (Atom)